

A motorized projector screen installation is essential for a professional-looking home theater, office, or classroom setup. It provides a sleek, retractable display that enhances the viewing experience. However, proper installation ensures longevity and optimal performance. In this DIY projector screen installation guide, we’ll take you through a step-by-step motorized projector screen setup, covering different mounting options, wiring setup, and troubleshooting tips.
1. Choosing the Right Installation Location
Before you begin the motorized projector screen installation, determine the best placement for your projector screen.
Ceiling vs. Wall Mounting
-
Ceiling Mounting: Ideal for rooms with limited wall space. It provides a clean, unobtrusive look.
-
Wall Mounting: This method is easier to install and suitable for rooms where ceiling mounting isn’t an option.
Best Height for Projector Screen
-
The bottom of the screen should be 24 to 36 inches from the floor for comfortable viewing.
-
Ensure the screen is aligned with the projector’s throw ratio for optimal image quality.
2. Tools & Materials Required
Gather the necessary tools to ensure a smooth motorized projector screen installation:
-
Drill & drill bits
-
Measuring tape
-
Level tool
-
Stud finder
-
Screwdrivers
-
Wall anchors (if needed)
-
Power drill
-
Ladder
-
Mounting brackets (included with the projector screen)
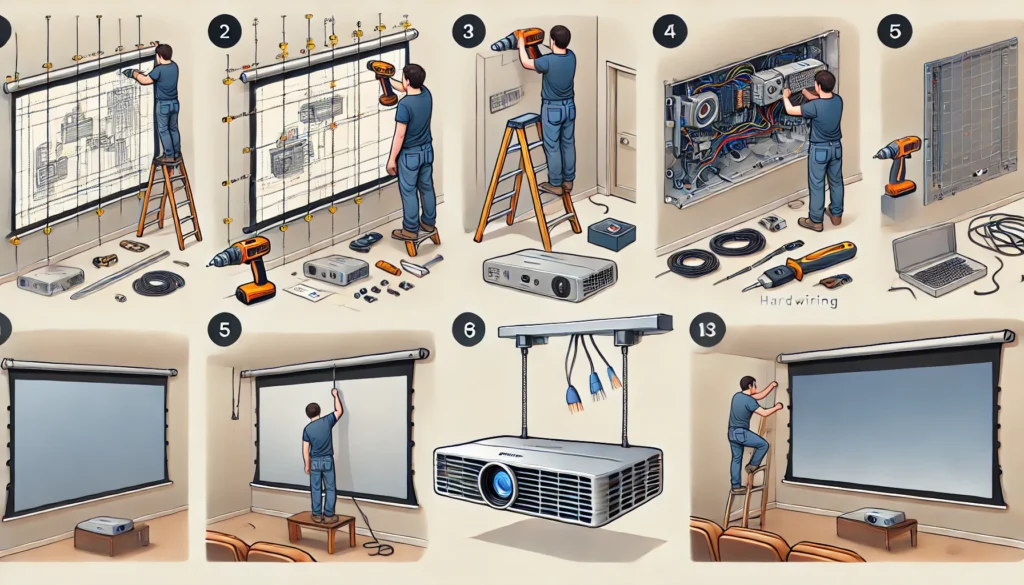
3. Step-by-Step Motorized Projector Screen Installation Process
Step 1: Measuring & Marking the Installation Points
-
Use a measuring tape to mark the center of the installation area.
-
A level ensures accurate alignment.
-
If wall mounting, locate the wall studs for secure installation.
Step 2: Installing the Mounting Brackets
-
Drill holes at the marked locations.
-
Secure the mounting brackets using screws and anchors.
-
Double-check alignment with the level tool.
Step 3: Attaching the Motorized Projector Screen
-
Lift the motorized projector screen and align it with the mounting brackets.
-
Secure the screen by locking it into the brackets.
-
Before proceeding, verify that it is firmly attached.
Step 4: Wiring the Motorized Screen
-
Plug-in Method: If the screen has a plug-and-play design, connect it to a nearby power outlet.
-
Hardwiring Method:
-
First, turn off the main power supply.
-
Connect the wires to the power source as per the projector screen wiring tutorial.
-
Secure the connections and test the automatic projector screen setup.
-
Step 5: Testing the Screen Movement
-
Power on the screen and test its retraction and extension.
-
Ensure smooth operation and adjust if necessary.
-
The remote control or wall switch should be tested for proper functioning.
4. Troubleshooting Common Motorized Projector Screen Installation Issues
How to Fix an Uneven Projector Screen
-
Adjust the mounting brackets if the screen appears tilted.
-
Inspect for obstructions in the rolling mechanism.
Motorized Projector Screen Not Retracting Properly
-
Check the power supply and connections.
-
Reset the motor by unplugging and replugging the unit.
5. Maintenance Tips for Long-Lasting Performance
-
Clean the screen surface using a soft microfiber cloth.
-
Store the remote control and wiring safely.
-
Avoid excessive force when operating the screen.
Frequently asked Questions
Ceiling mounting is ideal for rooms with limited wall space and offers a clean, unobtrusive look. Wall mounting, on the other hand, is easier to install and works well if ceiling mounting isn’t an option. Choose based on your room layout and installation convenience.
The bottom of the projector screen should be 24 to 36 inches from the floor for optimal viewing comfort. Ensure it aligns with the projector’s throw ratio to maintain image clarity.
Yes, you can install it yourself using a DIY projector screen installation guide. However, if hardwiring is required or you’re unfamiliar with electrical connections, hiring a professional is recommended.
Check the power source and remote batteries first. If the issue persists, try resetting the motor by unplugging and replugging the screen. Inspect the rolling mechanism for obstructions or damage.
Regularly clean the screen with a soft microfiber cloth to remove dust and fingerprints. Avoid excessive force when operating the screen, and store the remote control in a safe place. If you notice uneven movement, check and adjust the mounting brackets.
Conclusion
A motorized projector screen installation is straightforward when done correctly. Following these steps ensures a secure and professional installation, enhancing your viewing experience. If you’re unsure about hardwiring a projector screen, consider seeking professional assistance.
Get the best motorized projector screen for a seamless, high-quality display. Easy to install, smooth operation, and perfect for home theaters, offices, or classrooms.